
WooCommerce Plugin Installation
Step-by-step guide to install and configure the EPaySe Payment Gateway plugin for WooCommerce.
Requirements
Server Requirements
- PHP 8.0 or higher
- WordPress 6.0 or higher
- WooCommerce 8.0 or higher
- SSL certificate (HTTPS)
EPaySe Account
- Active EPaySe merchant account
- API Key
- API Secret
- Webhook Secret
Install the Plugin
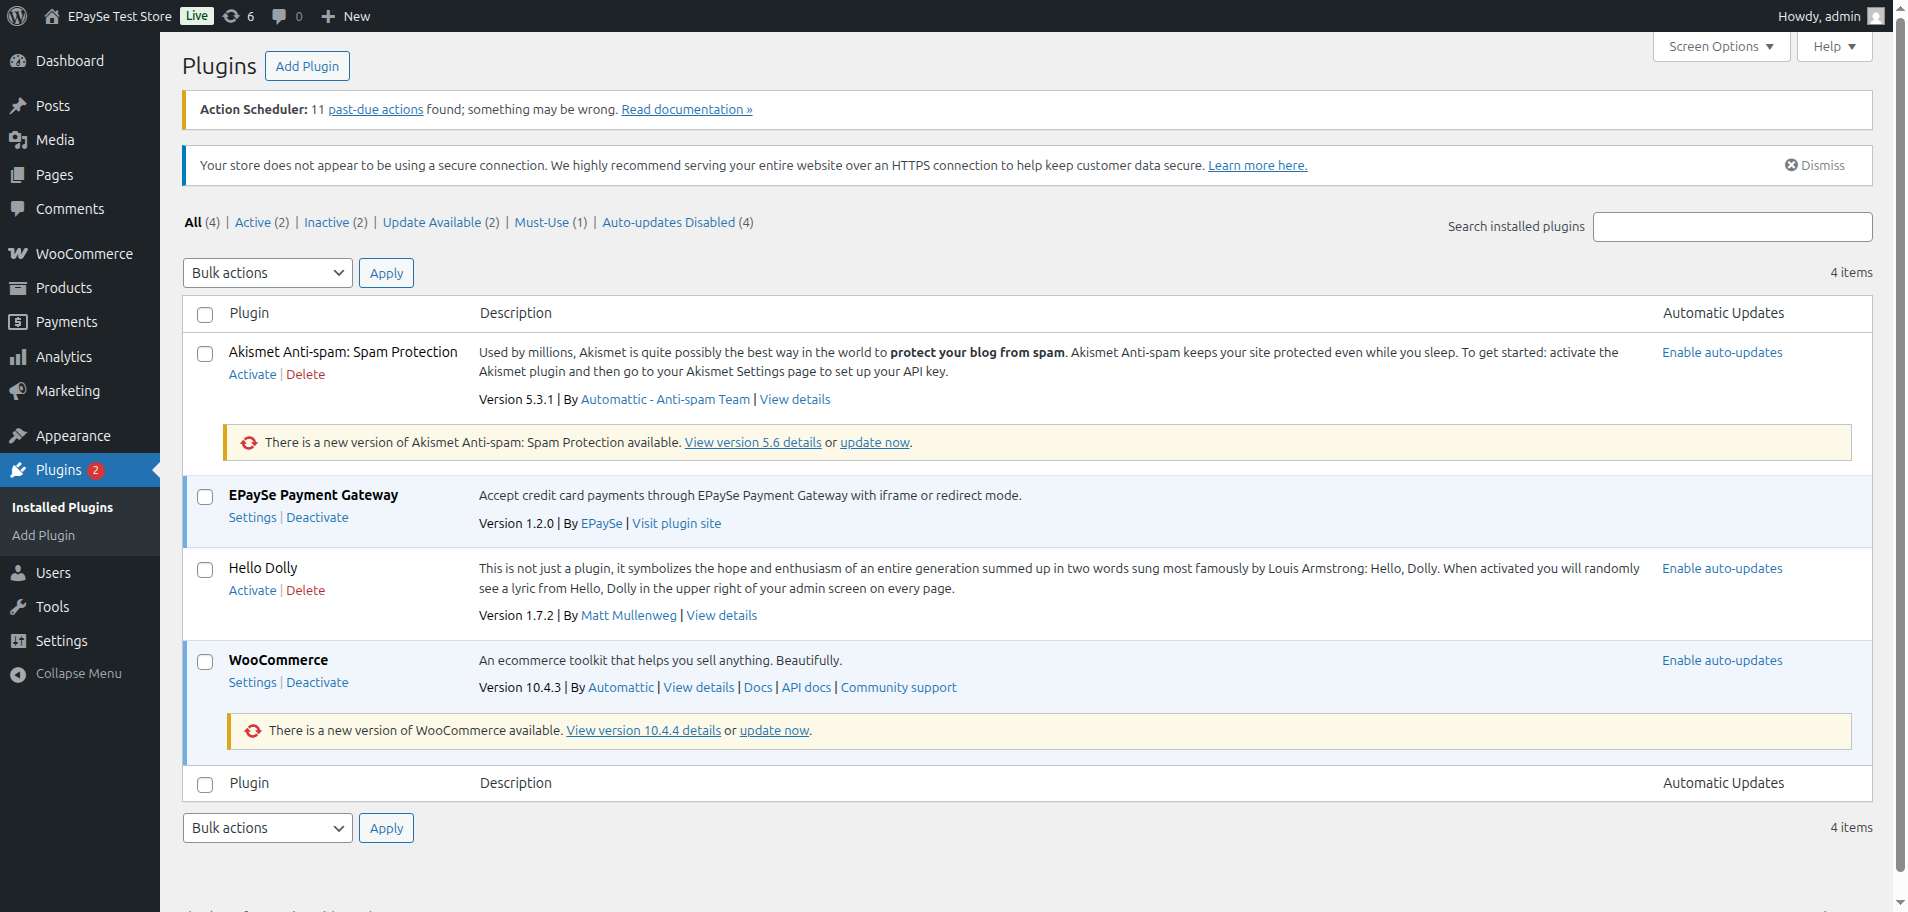
Upload the plugin ZIP file via the WordPress admin dashboard:
- Go to Plugins → Add New → Upload Plugin
- Select the
epayse-payment-gateway.zipfile - Click Install Now, then Activate
Enable in WooCommerce Payments
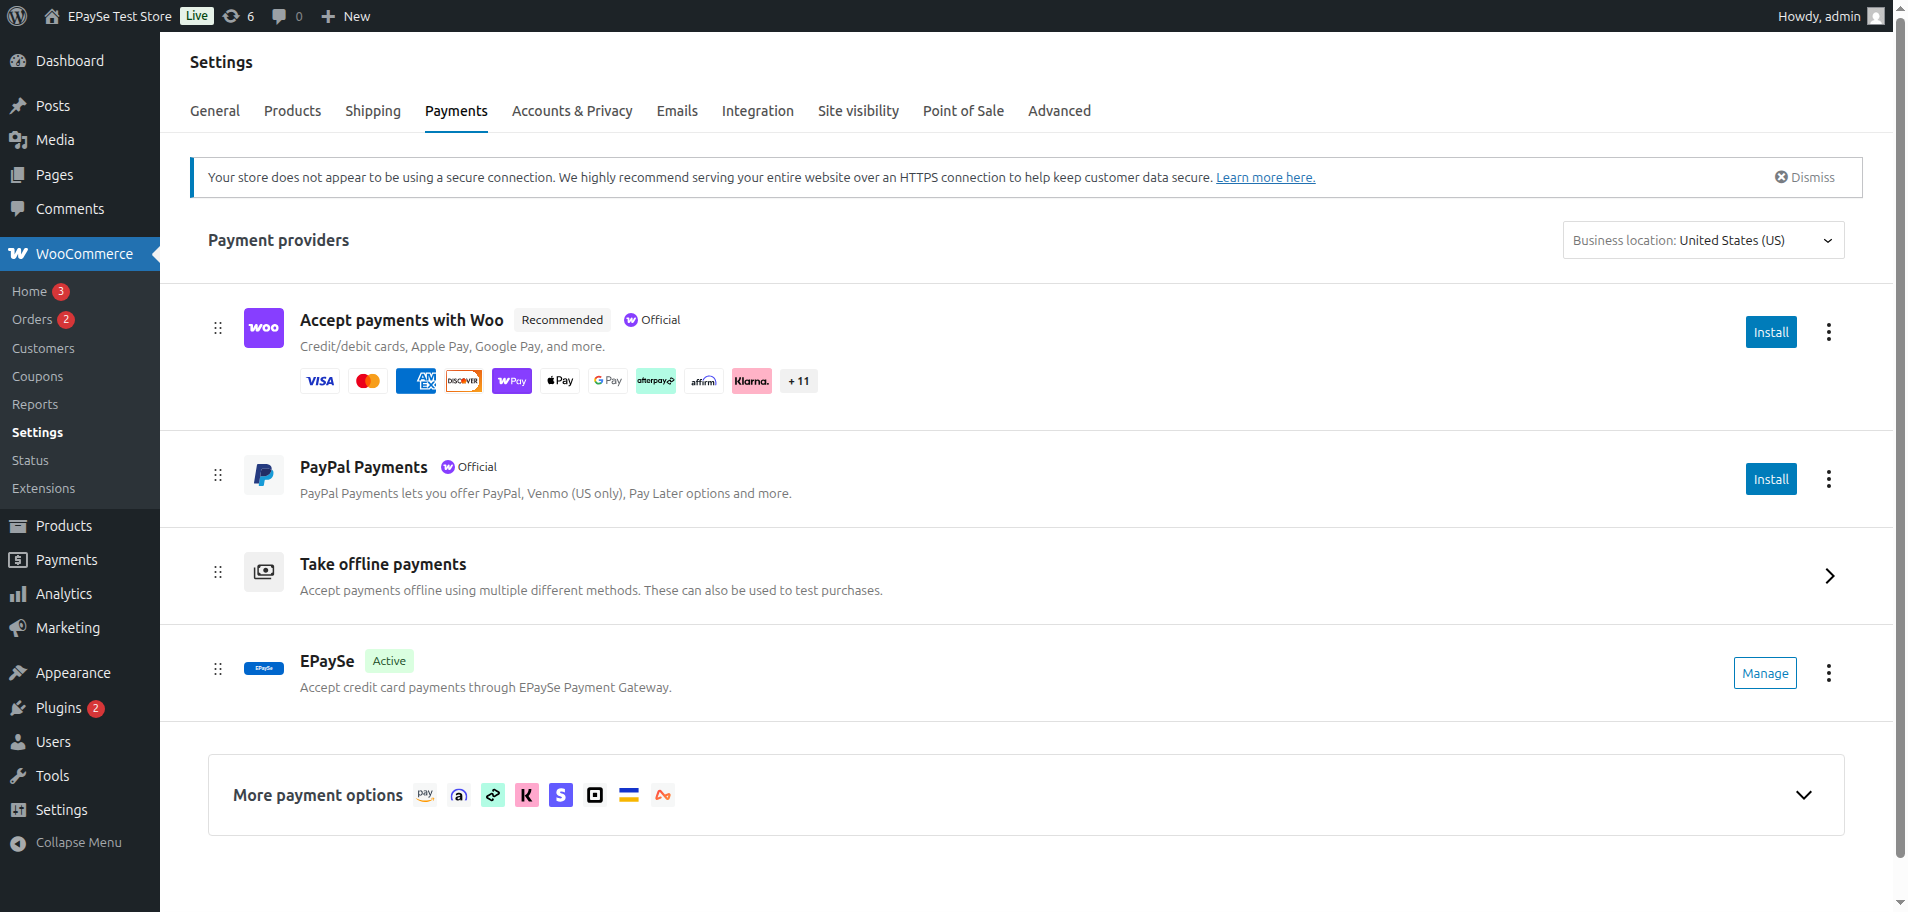
After activation, enable the payment method in WooCommerce:
- Go to WooCommerce → Settings → Payments
- Find EPaySe Payment in the list
- Toggle it to Enabled or click Manage to configure
Configure API Credentials
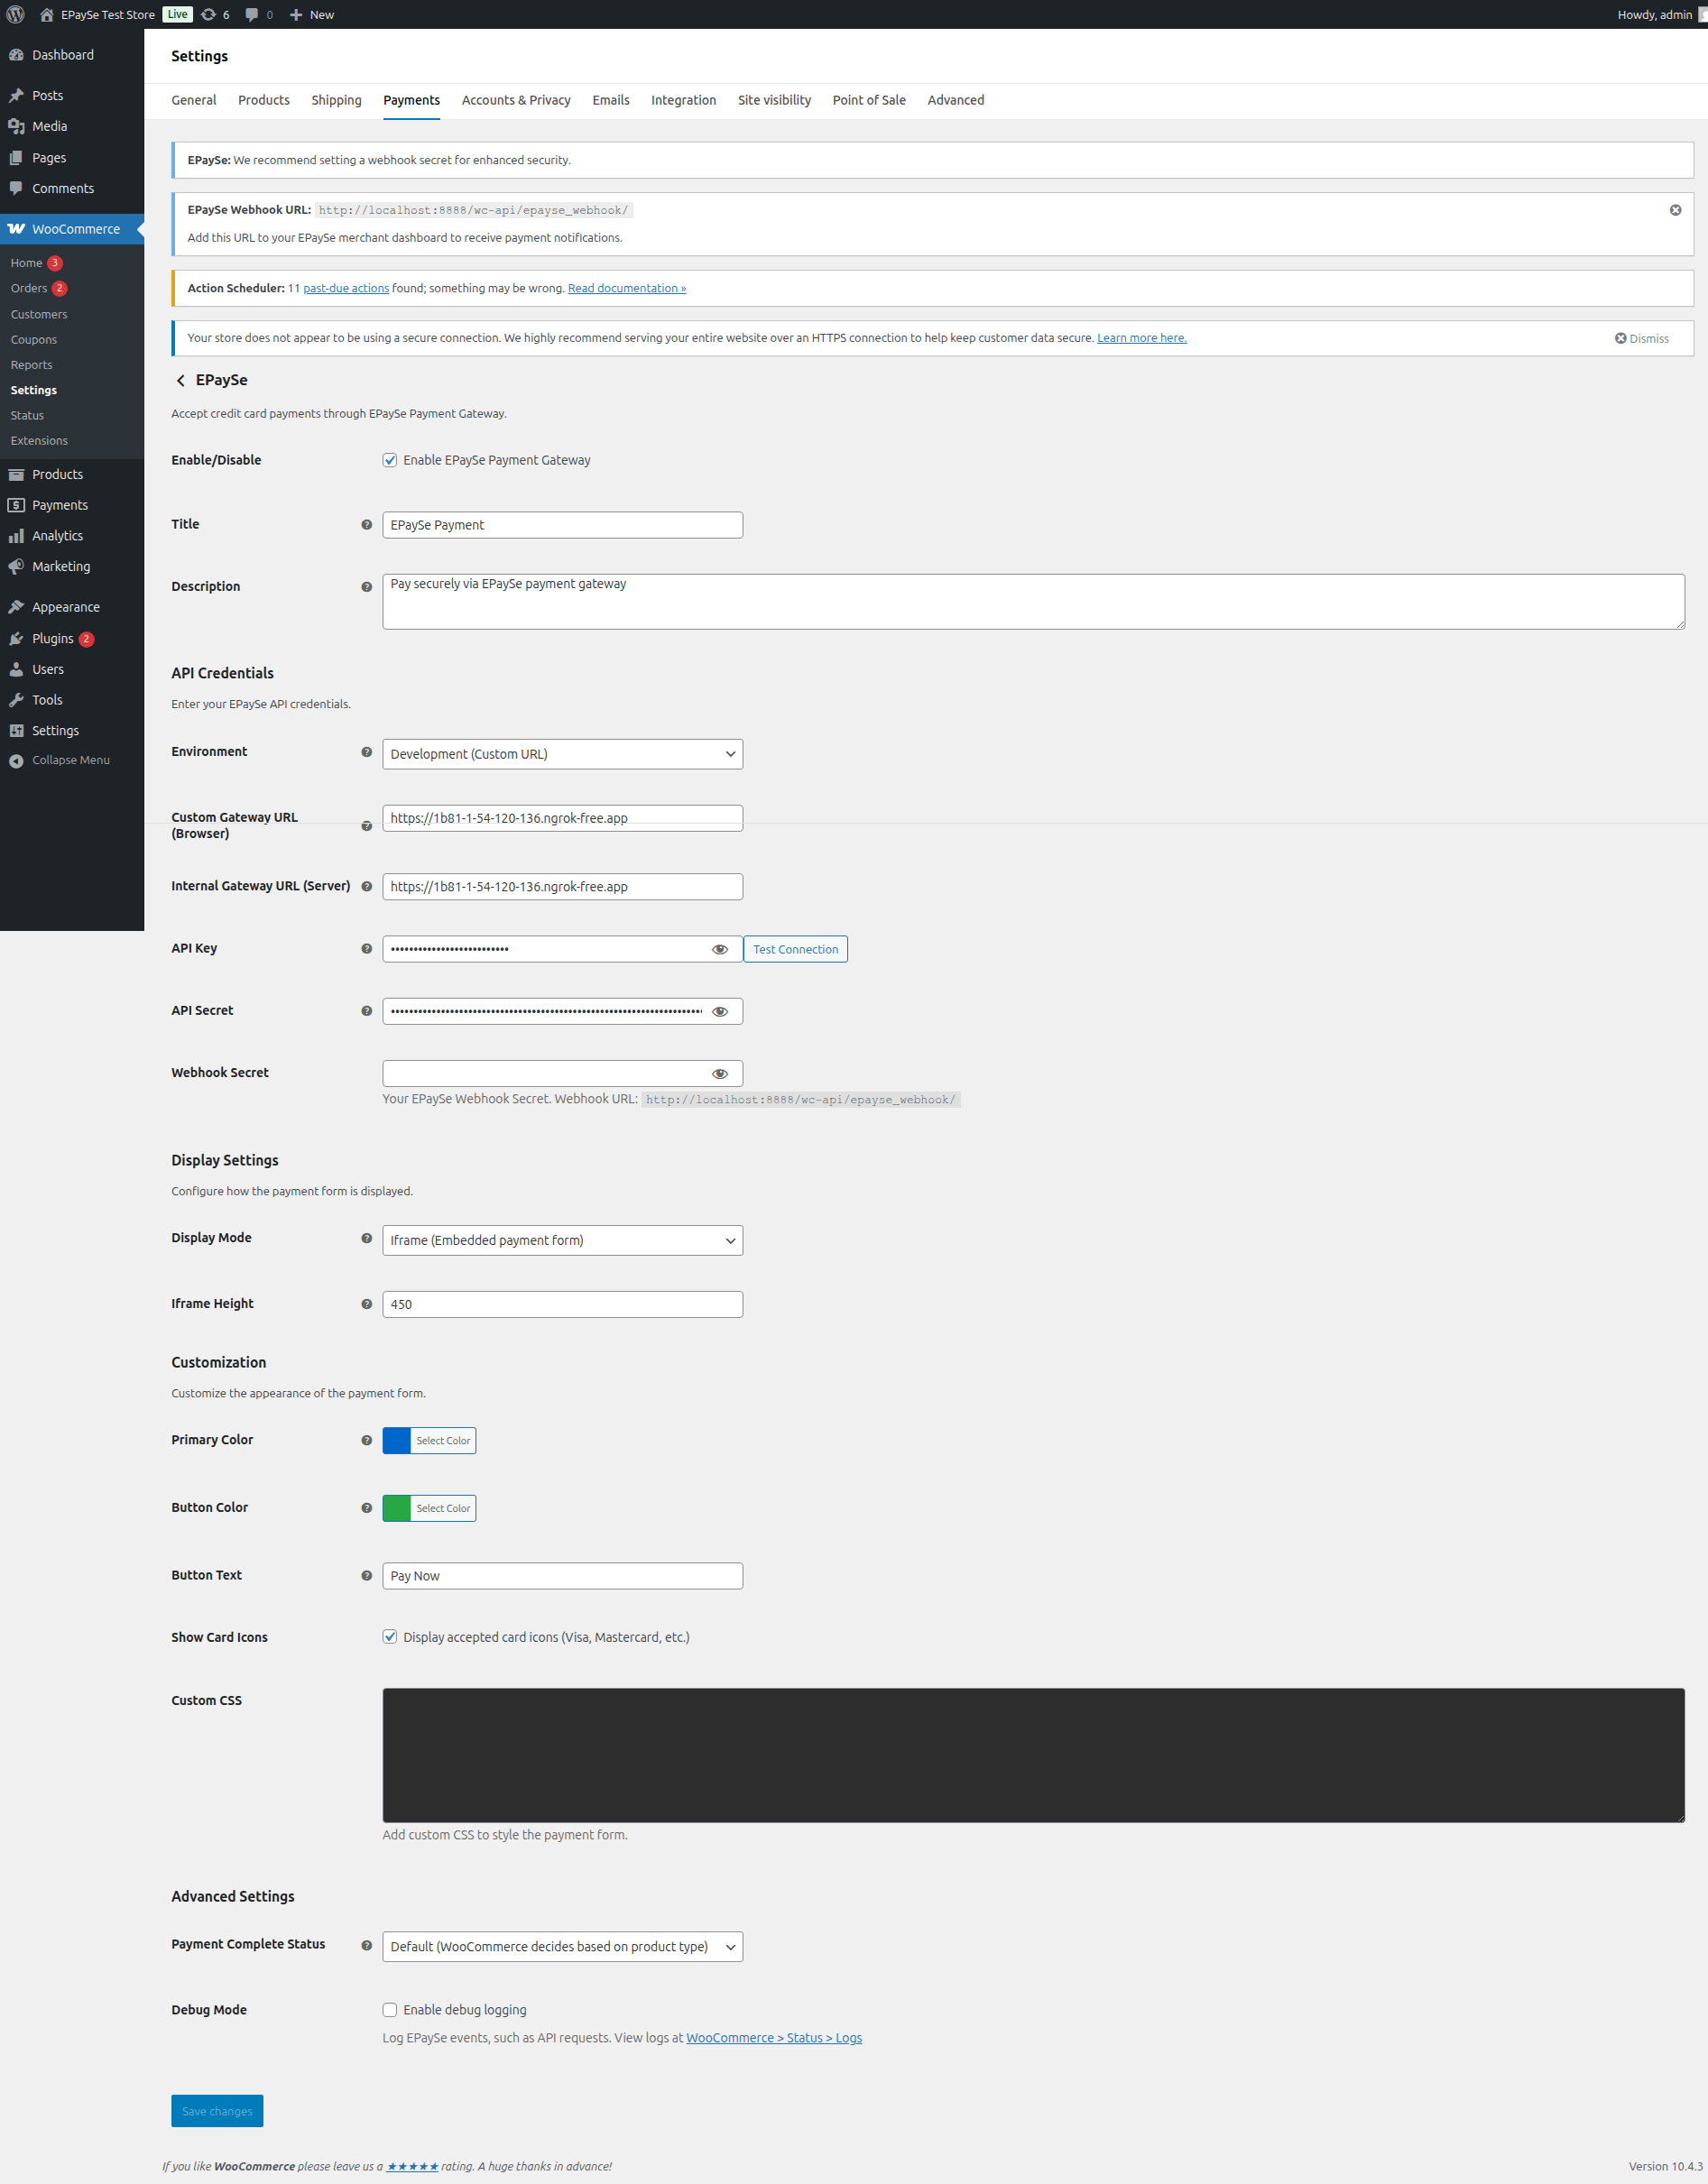
Enter your EPaySe API credentials to connect your store:
Where to find your credentials
| Field | Description |
|---|---|
| Environment | Select Sandbox for testing or Production for live payments |
| API Key | Your merchant API key from the EPaySe dashboard |
| API Secret | Used for HMAC-SHA256 signature generation on API requests |
| Webhook Secret | Used to verify incoming webhook signatures from EPaySe |
Configure Display Mode
Choose how the payment form appears to your customers:
Redirect Mode
Customer is redirected to the EPaySe checkout page to complete payment, then returned to your store.
Iframe Mode
Payment form is embedded directly on your checkout page via iframe. Customers never leave your site.
Set Up Webhooks
Webhooks allow EPaySe to notify your store about payment events (completed, failed, refunded). Configure the webhook URL in your EPaySe merchant dashboard:
https://yourstore.com/?wc-api=epayse_webhook- Copy the Webhook URL shown in the plugin settings (under Webhook Secret field)
- In your EPaySe dashboard, go to Settings → Webhooks
- Add the URL and copy the generated Webhook Secret
- Paste the Webhook Secret back into the plugin settings
Important
Advanced Settings
| Setting | Default | Description |
|---|---|---|
| Payment Complete Status | Default | Order status after successful payment. "Default" lets WooCommerce decide based on product type. |
| Debug Mode | Disabled | Log API requests and responses to WooCommerce → Status → Logs (source: epayse) |
Test Your Integration
Before going live, test your setup using sandbox mode:
- Set Environment to Sandbox (Testing)
- Enable Debug Mode to monitor API requests in WooCommerce logs
- Place a test order using the test card numbers from the Test Cards page
- Verify the order status updates correctly via webhook
- Once confirmed, switch to Production (Live) and update your API credentials
Checklist before going live
- ✓ API credentials entered correctly
- ✓ Webhook URL configured in EPaySe dashboard
- ✓ Test payment completed successfully
- ✓ Order status updated via webhook
- ✓ Environment switched to Production
Next Steps
Learn how to use the plugin for checkout, order management, and refunds.